SUMMARY
This article will explain how to replace the EPROM of 3000 series equipment. This may be necessary in the event you would like to update the firmware on the machine. The firmware update will need to be requested from Humboldt. Email support@humboldtmfg.com and please indicate the product you have and the current firmware version the equipment is using. The firmware (software) version can be found in the equipment settings.
WARNING: UNPLUG POWER CABLE from equipment before proceeding.
SOLUTION
- Turn off power to machine.
- Unplug power cable from machine or outlet.
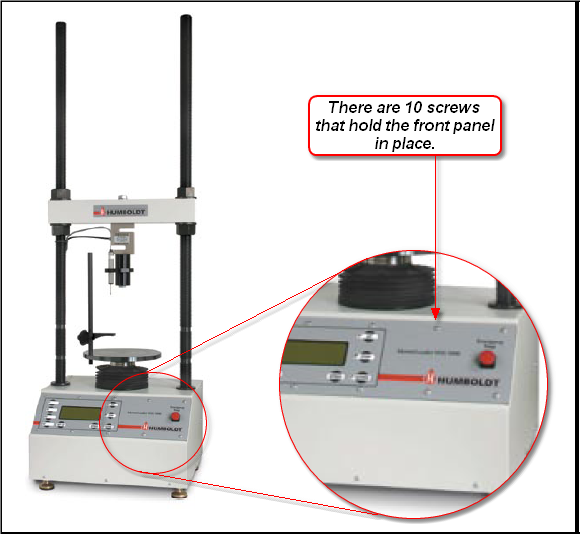
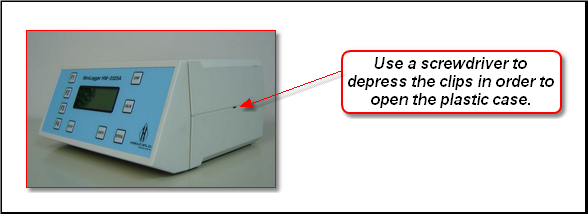
- If you are using a HM-3000, HM2470A, or HM-2560, unscrew front panel (Figure 1). Anything else will be in plastic housing and the top cover can be taken off using a screwdriver to depress the clips on the sides (Figure 2).
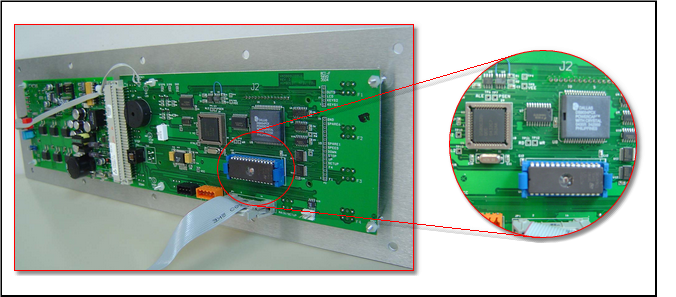
- Set the front panel facing down (so that the circuit board is facing upwards). Find the blue socket and press the tabs outward to release the EPROM (Figure 3).
- Pull the old EPROM out, noting the orientation of pin 1. Pin 1 side of EPROM will have a groove on one side of chip.
- Install new EPROM making sure that the groove indentation on the chip is pointing in the same direction as the pin 1 indicator on the board. The pin 1 indicator will be a number 1 printed on the circuit board.
- Press the chip into the socket making sure not to bend any pins.
- Replace the front panel by screwing it back on, then plug in the power cord and turn the machine on.

Figure 1: Finding the screws on the front panel of a HM-3000 Master Loader.

Figure 2: Finding the clips on the side of a HM-2325A Mini Logger.

Figure 3: Finding the EPROM. (HM-3000 panel shown above)
Comments
0 comments
Please sign in to leave a comment.