SUMMARY
There are several potential causes for the HM-3186 failing to achieve the target temperatures during the cooling cycle. This article will address the most common cause of this, which is a loss of refrigerant in the cooling system.
The procedure below will instruct the user how to conduct a cursory check of the refrigerant level.
PROCEDURE
Checking PSI Readout
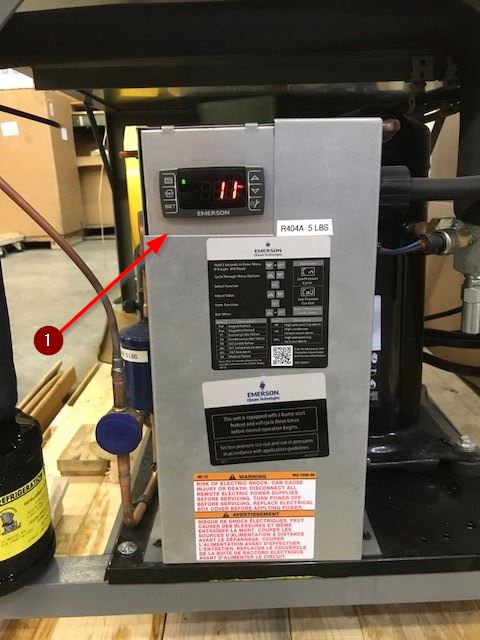
Check the PSI readout on the display immediately upon compressor startup (see figure 1).

Figure 1.
- When the compressor first starts, the readout should initially be in the 80-100 psi range before settling into the 50-60 psi range after a few seconds. As the temperature begins to fall in the sample chamber the pressure will continue to slowly fall until it is in the 10-15 psi range at the lowest temperature as shown in figure 1.
- If the initial pressure is below the 80-100 psi range it is likely that the refrigerant level is low and needs to be recharged.
Checking Refrigerant Inspection Window
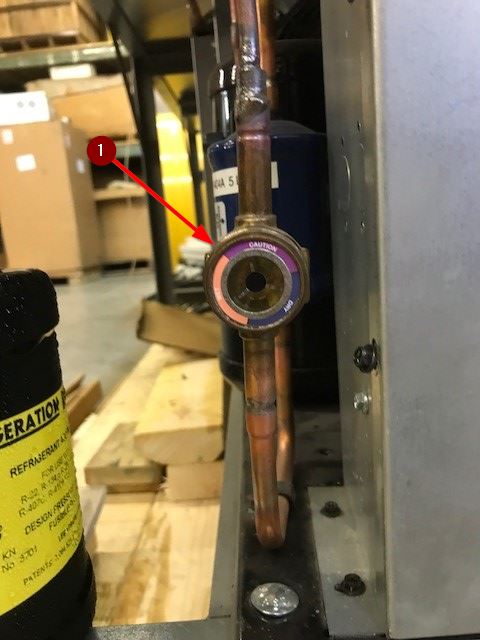
Check Refrigerant inspection window located to the left of the compressor’s control display (see figure 2).

Figure 2.
- When the compressor initially starts the window should become cloudy or like there are particles within the solution. This cloud is a mixture of small air bubbles and refrigerant flowing past the inspection window.
- After 2-3 minutes the refrigerant will clear as the air is dissolved and there should no longer be any indication of bubbles or cloudiness flowing past the inspection window.

Comments
0 comments
Please sign in to leave a comment.